Monday, August 31, 2015

Bible Covers


L has been asking for a real bible for the last month so I finally took her to pick one out. When we were there, they both wanted bible covers, but I didn't want to spend $25 on a cover each. I told them I would make some and they were ok with that. I found a ton of really cute ones on pintrest that were simple and both kids liked. Then we went to JoAnn's and they both decided they wanted zippers and pen holders. No matter how much I told them how cute the other ones were, they were insistent they really wanted to zip up their bibles. So, back to searching for a good tutorial. Sure, I could figure it out, but it wouldn't turn out quite as good as if I followed directions or it might have taken me a few tries. I really didn't want to do that.

I found this tutorial by Tracy's Treasury. It was perfect! It was exactly what I was looking for and almost everything was sewn on a surge. I love using my serger!

After both kids picked out their fabric, I went to work on their covers. Little C wanted his cover to match his bible exactly. I came up with this, not quite exactly, but pretty darn close.


I thought I'd show you how to do the zig zags. It's really quite simple. You just basically cut straight across, then cut slits in at the top. Fold those slits down like the picture...


And iron them...


Here is the other side.


Pin it onto the fabric you want to sew it to and top stitch right along the edge.


Little C was very specific about wanting a pen holder.


For the zipper, I needed some interfacing to make it a little more sturdy. I didn't want to use anything toxic and I try to stick with 100% cotton fabric so I found this 100% cotton interfacing. I don't know much about the glue and how toxic that is, but at least the fabric is good.


Happy boy, all done!


L wanted a pen holder also. I made it a little big though. 


Since her bible is so tiny, it was harder to sew the zipper on. The back side turned out a little better. The front looks a little crooked on the corner where the zipper is. On both their bibles, I made the outside pockets a bit too small, I think. But, the kids don't think so and that's all that matters.


Now that I got my experience on C & L's bible covers, I needed one for myself.


I was very happy with the way mine turned out. On C's I learned that the zipper needs to be a thin robe zipper. That is much easier to sew through and I didn't break as many needles.


I ran into one little problem, I didn't have enough fabric to make the zipper part wide enough. I really didn't want to go back to the store to buy 5 1/2 inches of fabric, wash it and re-cut it, so I added a bit of the coordinating fabric instead. I actually really like the way it turned out. I wouldn't have wanted the grey next to the white zipper, but that little bit on the edge was perfect. You can look back up at the first picture to see how it looks from the top.

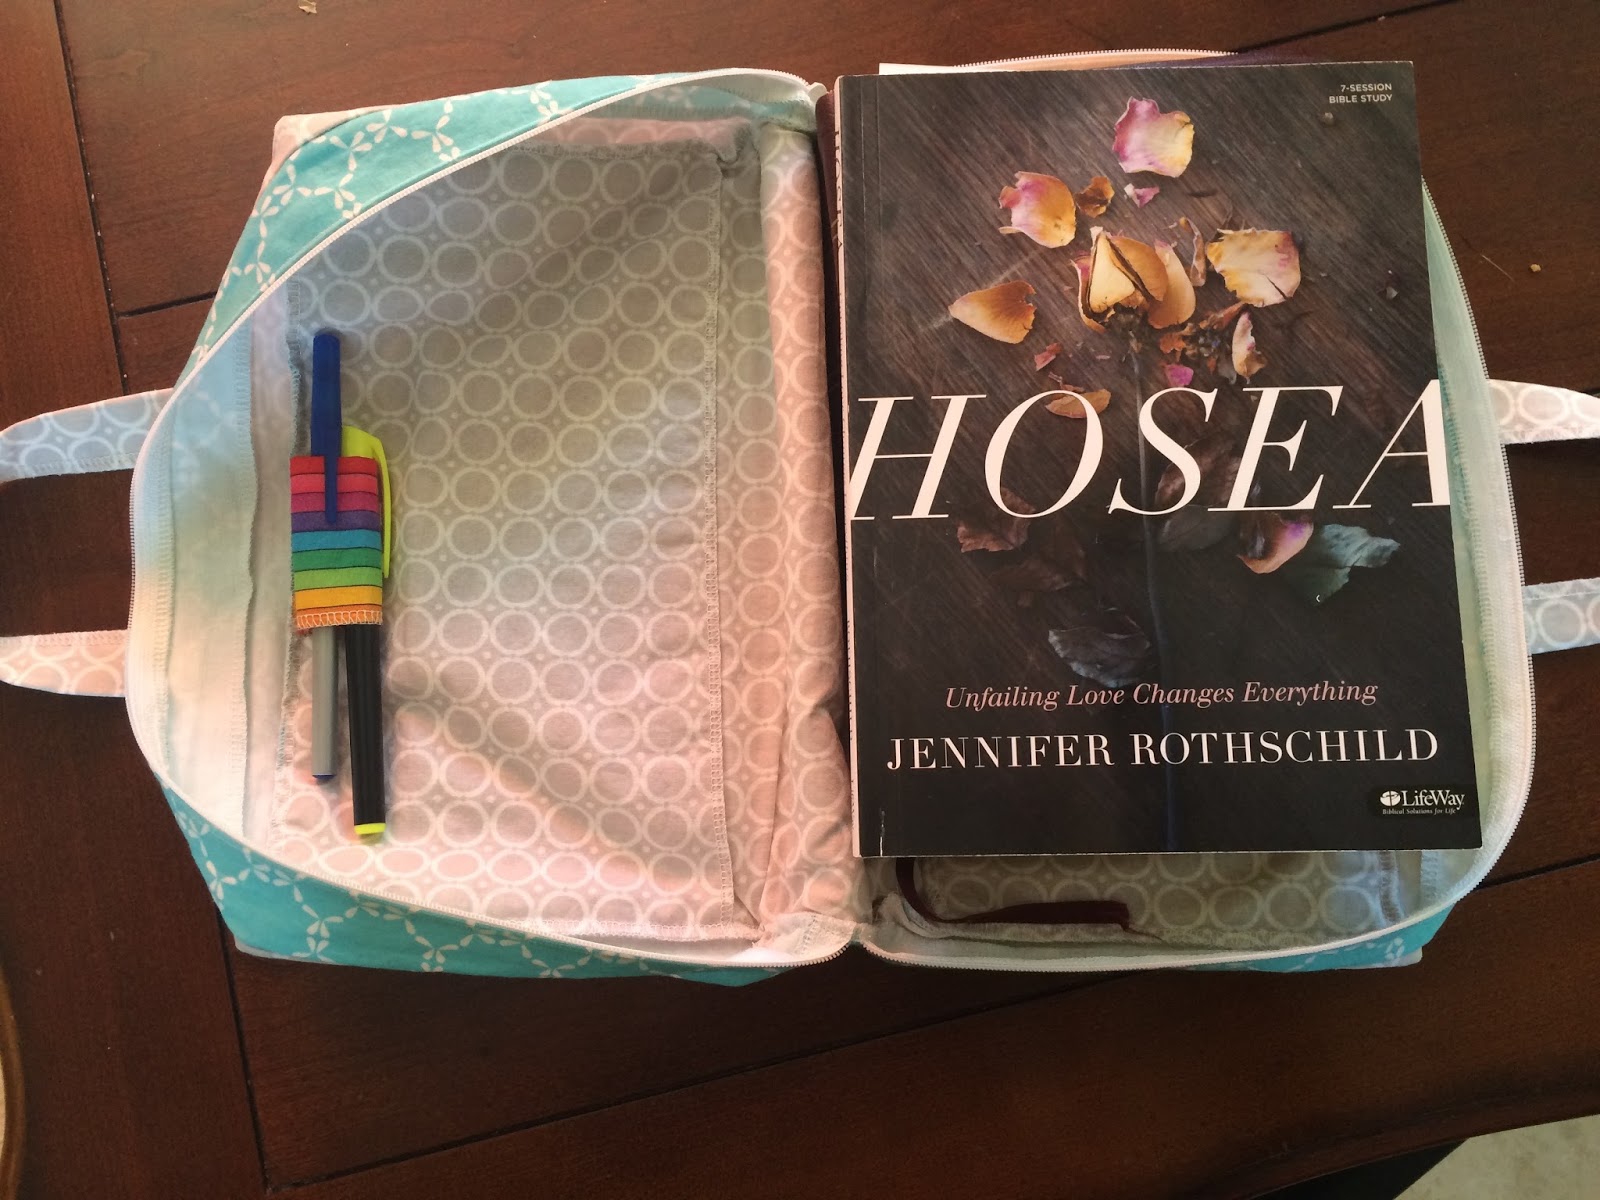
My cover is roomy enough to fit my bible study book and some extra papers.


It's always fun to have a little sewing project!

Kristen

Friday, August 28, 2015

DIY Black Out - Heat Blocking Window Covering

We have these huge slant windows in our bedroom that go all the way up to the vaulted ceiling. They are so pretty and it is beautiful when they let light in, especially in the winter. But sleep is more important to me then the nice pretty light during the day. Also, in the summer it is just way to hot for that sun to heat up my bedroom first thing in the morning. 

These pull down shades are what the previous owner had.


We never changed them because I was holding out for shutters. I wanted something that I could open and close with some sort of ease. Those windows are so high, nothing is really practical. But those dirty old ridiculous things were just so bad! We had to do something. Mr. C build a frame out of 1 x 1's and I bought some energy star black out curtain lining at JoAnns and stapled it to the frame. It fits perfectly in the window, it is super light and it cost about $24 per window. This is the lining I always use, Roc-lon 100% Blackout Budget Drapery Lining.


The gaps that let light in are all gone around the edges and it is very clean. Except for the missing trim.


Now I just need to get rid of the blue curtains, but only after I figure out some sort of hidden black out that is easy to roll up in the morning and put down at night.


Wednesday, August 26, 2015

Master Bedroom Reveal


Ever since we painted our room the same color as the rest of the house, I have been wanting to change it. Actually, I never wanted to paint it the same as the rest of the house, but we couldn't agree on the right blue and we had too many other projects, so our room got stuck with the same paint as everything else. Now, finally 3 years later, I found my blue (in my friend's family room) and took 2 days ignoring the kids (well, the did help a little) to repaint it.

Since, I painted, I noticed, I never finished all my before and after posts from our house. I got busy and stopped blogging for a while, but it also seems that nothing is completely finished. It's hard to post an incomplete after. I've decided I'm just going to show you what I have and I'll just list what I want to finish.
Let's start with the master bedroom. I'm going to put before pictures matched up with after pictures of the same shot, it will be easier to see the transformation that way. This first one is from just inside the door looking towards the balcony.


We painted (twice!), changed out the window coverings top and bottom, new doors, new trim and floor. We had originally painted our room the same color as the rest of the house, but I couldn't stand that color in our room. It was so drab. We still need to add trim to the upper windows, but they are much better without the bunched up pull down shades. We needed black out so we could sleep at night and this is what we came up with.


Looking out at the balcony. We still want to redo that.


This picture is standing near the doors and looking the other way.


I wish I had a picture of the old space age looking white and gold sconce. 


Another before. Looking at the bed and one of the closets. I know, it's a little blurry. You can still see the white old walls, gold edge on the old closet door and no trim.


We changed the closet doors, added trim, painted the walls and ceilings, and added knock down texture to the ceiling.


Here is just a picture of the wall color before I painted the blue. It has a completely different feel. I just didn't like it at all.


Here is the bathroom and the other closets before.


Much different! I don't have a good picture of the mirror before, but it was one mirror all the way across with one light fixture. You can see in the mirrors that I still don't have closet doors. We changed out the cabinet, new counter top and back splash, added 2 light fixtures, 1 for each mirror and new medicine cabinets. Also, Mr. C got a plug on his side also.


There you have it! Master bedroom before and after. It's fun to look at these pictures and see what it used to look like. Since I just painted it and replaced the window coverings this month, it got me motivated to do the before and after. The Master Shower reveal is here at another blog post.

Here is my to do list for the master bedroom still:
  • Decor on the walls
  • Trim on the upper windows
  • Closet doors for the closets by the bathroom
  • Black out roller shade for the sliders and just sheer white curtains (remove the blue black out curtains).
There might be a thing or two not on the list that I am just so used to that I don't notice. Maybe in another 3 years it will be done. 

Kristen


Monday, August 24, 2015

Gluten Free Pancakes

I'm still working on those morning meals. Pancakes is a favorite around here, but unless you have some eggs to go with them or some nut butter on top, they are just not a good start to a day. It's basically a bread (turns into sugar in the body) topped with sugar. But, we do have them as a treat on occasion. 

I hate when I start making something only to notice I am out of an ingredient I need! I went to make the pancakes, told the kids that's what we were having and I was completely out of my Pamela's Pancake Mix which is so simple to use. Luckily, I had a ton of Pamela's Bread Mix to replace the all purpose flour in my regular pancake recipe and of course, I used Coconut Oil, my favorite oil for baking.


When ever I use the bread mix, I have noticed my dough is a sticky. Just an observation. It doesn't bother me unless I am making tortillas because you use your hands for those. Even though the dough is a little sticky, they cook great on my cast-iron skillet with a little coconut oil. This is my absolute favorite cooking pan! I use it for EVERYTHING! Plus all I need to do is wipe it clean with a wet cloth when I'm done. I have one in my trailer and one in my kitchen.


First try replacing all purpose flour with my Pamela's Gluten Free Bread Mix and they were a hit with the kids!


If I figure out a tasty high fiber recipe, I will share that as well. In the mean time, these are great for a little treat or to accompany a good protein.

Monday, August 17, 2015

Gluten Free Banana Muffins

After chronic stomach aches and sore throats without being sick, we had our son tested for food sensitivities and we found out he can't have wheat, corn and peanuts. Those are high on his list of sensitivities but, there are other things he can have only occasionally like, soy, gluten, and asparagus among others. 

Now, we have entered the world of gluten free (if you can't have wheat, just go for gluten free). The hard part is, many gluten free products have corn in them. Corn is almost an immediate reaction for my son and I. I also find soy in many products, even though soy is lower on his list, it is still there and he can not have it every day so I have to avoid products without soy. We have found gluten free breads to not be very good and I like to make my own stuff at home anyway. I am so excited to have found Pamela's Gluten free Bread Mix! I can use it as an all purpose flour and make home made bread. 

As we are preparing for school, I'm trying to come up with some different things for breakfast for my kids that is not just sugar like cereals. We can do eggs and oatmeal, but none of us want those every day. So, I'm making some healthy muffins.


I used my Pamela's Bread Mix as an all purpose flour for banana bread and added a little almond meal (not to be confused with finer almond flour) for some extra protein. Instead of white refined sugar, I used honey. This is not the honey I use for my energy balls, when we will be eating the honey raw, I always use raw local honey from our local farmers market. The cheaper honey is for baking and cooking only. 

L decided to help when it was time to fill the muffin tins.


I needed my little helper to taste test them for me because I can't have almonds. They were a success! The kids loved them and they will make a great breakfast or snack in their lunches.


Recipe:

1 1/2 c Pamela's Bread Mix
1 1/2 t baking powder
1/4 t baking soda
1/4 t cinnamon
1 egg
1 c mashed bananas (3 large bananas)
1/3 c honey
1/4 c coconut oil
1/2 c almond meal (or oatmeal if you can't have nuts)

Bake at 350 for 20 minutes. Test with a tooth pick for doneness.


Let me know what you think if you try them.

Kristen

Friday, August 14, 2015

Sprucing up some chairs

I had these old chairs around my pool. They were functional, but not very pretty. So, I decided to spruce them up a bit. 


I had to wash them off and since it is almost 100 degrees out, I didn't have to do much work on drying them. I did have to knock off some chipped paint also.


L and I primered the chairs and little table first.


Since I love pops of color and we have a pool with turquoise water, I decided to go with "seaside" for the chairs. If you want the color for yourself, you can click the color name or click here.


I love how they turned out. Nice and bright and clean!


The old chairs blended in so much that I forgot I had 4! I just noticed the other 2 in my yard this morning and quickly painted one more. I need to go get more primer for the other one.


I left the table white for a little contrast. (Again, you can click the color for the exact paint) They also have it at any home improvement store in the white. In the end, I ended up using painting 3 chairs and a table, I used 3 cans of primer, 1 can of white, and 3 cans of seaside. I have some seaside and white left over.


I have 4 other metal chairs that are bigger and rock. I am thinking a different color for those. Maybe a rusty red to tie in the pavers on the patio outside the pool. Feel free to let me know what you think for a good color to add!

Sunday, August 9, 2015

Kitchen Wall Part 1

I have this long awkward wall in my kitchen that I have just not come up with the perfect purpose until last month. After lots of searching on pintrest and wanting somewhere to display my home canned goods I finally found a couple of ideas I am putting together.

Remember those picture frames I made from old pallets. Here is my project with the rest of the wood.


I just cut up the thicker boards from the pallets and screwed them together to get a little shelf.


Mr. C was worried about all the jars falling out if there was an earthquake so I used some picture hanging wire I found in the garage to help hold things in. I love the look of the wire on it and it serves a purpose. 


Time for canning and lotion making!