Showing posts with label remodel. Show all posts

Friday, June 19, 2020

Trailer Remodel

Welcome to our tiny home! 


It was a nice trailer before, pretty new, only 4 years old and in good condition. But it was so incredibly dark!! I never loved it. I liked how the space worked for us, but the kitchen had no working room because of the over mount sink. It took me a couple years and being locked down for a couple months for the hubbs to give in and let me go for it. Here is a picture of the kitchen after and before, I know, it should be the other way around... oops!


I started with the bathroom just to see if it would hold up and it did. We went on a weekend trip to the hot Colorado river and no problems with the paint.


 Before the bathroom was roomy, but very dark with all that brown wood and tan walls. Just kind of dark and blah. After painting I added a back splash some decor and painted our little shelf blue. Color makes me very happy!


I loved the way it turned out and every time I went in there it just felt so much like a real home. I was told very reluctantly if I sprayed the cabinets and did not roller them, I could do the rest of the trailer. The hubb's truly was not happy about this project.


I started prepping in the bedroom. It ended up being about 90 degrees this day and I was in this little hot box trying to get this paper and tape to stick everywhere I didn't want paint hitting since I was spraying. This is when it hit me how much work this project was going to be.

BEFORE

AFTER

AFTER


It just feels so much cleaner and I can actually see in it now that it's lighten up a bit.

Here is a bit of the work in the main part of the trailer. We have a toy hauler, so it is a garage when we are traveling. Everything needs to fold nicely up to the walls to fit the dirt bikes in it. The beds in the back move along a track up to the ceiling.


Prepping this part is where I started asking for help, Dr. C knew he was going to make me a new counter top, but not a big deal, I told him that was all I needed him to do. He really didn't want to do any of the work, he even asked me if I was SURE I wanted a new counter. I have said I needed one every single trip we went on and we spend A LOT of time in our trailer. 

When I got to this portion of prepping, I was already physically exhausted. This was just a couple days into the project, but the ceilings in a 5th wheel are tall and I am 5 foot 3 inches. On a ladder there are portions of the ceiling that I can not reach. So reluctantly, he helped me.


We had 1 month between when we got home from our river trip till we were going on our summer road trip. I had less then a month to get this baby done! I was working as much as I could while neglecting my regular job and my kids. In the evening someone would come in the trailer and ask me about dinner, I'd have to stop painting and make dinner while the hubb's cleaned the paint spray EVERY SINGLE TIME! It's the little things. 

BEFORE
Remember how I said, color makes me happy? Well, I needed another place to put my lovely blue. I thought painting it behind the curtain where the beds are would be perfect, it makes it feel somewhat separate.

AFTER
 See that little table by the chairs? Again, with a toy hauler, nothing can be out. It gets really annoying when I have to pull all the tables out from under the bed when we are stopping at multiple places. I really miss having a dinnette that folds up to the wall like our old trailer.

BEFORE
 Dr. C had a nice little surprise for me. Unfortunately this is not the first one that was made.


I picked the stain, but it did not quite turn out what I was picturing and then before getting approval, Dr. C put a glossy poly urethane on it. I didn't want to say anything because he worked so hard, so I just mentioned I wanted a different poly on the counter top. But at the river a friend showed me a picture of a bar with burnt wood! I completely forgot about that technique and that was what I wanted!! Once the countertop was done, the hubb's could not leave this little table how it was. So, I got a second perfect little table.


It's the little things that go a long way. This lovely little painting tent was one of those little things and was made just for me to spray the doors! This saved me so much time and made them turn out so much better then if they were on the ground.


Here is my kitchen before, dark, no back splash, over mount sink, and no counter space.

BEFORE
Here is a picture of the blue risers on the stairs, this seemed to be the best place to stick this picture.
AFTER
Trailers have small kitchens to begin with and when we bought this trailer, I thought that little bit of counter would be enough, but with the limited cabinet room, it usually holds my banana's, melons and Malibu rum. So, not much space left to work. The faucet was horrible to work with also.


Changing out the counter top meant taking out the oven, since the oven was coming out, might as well take out the microwave to make my life easier. Dr. C is so helpful!


AFTER
Now, look at all that counter space, the wonderful faucet and the amazing countertop. My tiny kitchen is my favorite part of my tiny home.


This countertop is closeup worthy. It is made with stainable plywood. In a trailer you have to keep things light and we couldn't do much more than plywood for weight.


Trailer remodel - start to finish - 3 weeks! Now one week to get ready to go on a road trip. 

Kristen

Friday, September 25, 2015

Stairs Before & After

When we bought this house, we noticed right away that the railing shook about an inch on either side. This was a safety project that absolutely needed to be done. I wasn't terribly upset about that though. The 80's oak isn't exactly my favorite wood.


You can also get a good view of what used to be a closet at the top of the stairs. We took that out to make our master shower bigger. You can see that post here. Our hall way was lined with doors and I didn't like that, so that was another reason to get rid of that closet. Don't worry, we have tons of closet space.


Mr. C started with taking out the railing to put wood on the stairs. That was a big job! I was able to lay wood everywhere else, but I didn't have the patience to even attempt this! (Not to mention, he didn't trust my patience with it as well.)


Home Depot has banisters, railing and the big posts in pine, oak and metal. We went with the pine because I didn't want the wood grain and I wanted the stain to really show up. After staining and sealing the wood parts, Craig got to work on the spindles. We were so happy to see this go up finally about a year after we moved in. The railing came out the week we got the keys, so the top floor was off limits to the kids.


The most difficult part of this project was getting the angle correct on the banister. The top set of stairs was not built to code and they are not quite as tall as a normal step so the angle on the banister is different then standard. I think Mr. C had to buy a new railing and post because of mess ups. He felt like Alexander and the Terrible, Horrible, Very Bad, No Good Day. From what I remember he woke up, tripped on a hole in his jeans, pealed his toe nail off, cut the railing too short, realized the post was cut too short and a lot in between. I wish I could remember it all because it was quite comical.


Here is the finished stairs. Wood with white risers, no more door at the top of the stairs and new railing. I am so happy with the way it turned out. I love Mr. C's suggestion of the white risers. They do get dirty, but they are not hard to clean or touch up with a little white paint.


By the way, this too is a project that is incomplete. You can barley tell, but at the bottom of the top section of stairs there are 2 spindles missing. Your guess is as good as mine for when it will get finished.


Just some more views. This picture you can see the pattern of spindles we choose.


Now we are safe on our stairs again.

Kristen

Monday, September 7, 2015

Little C's Room

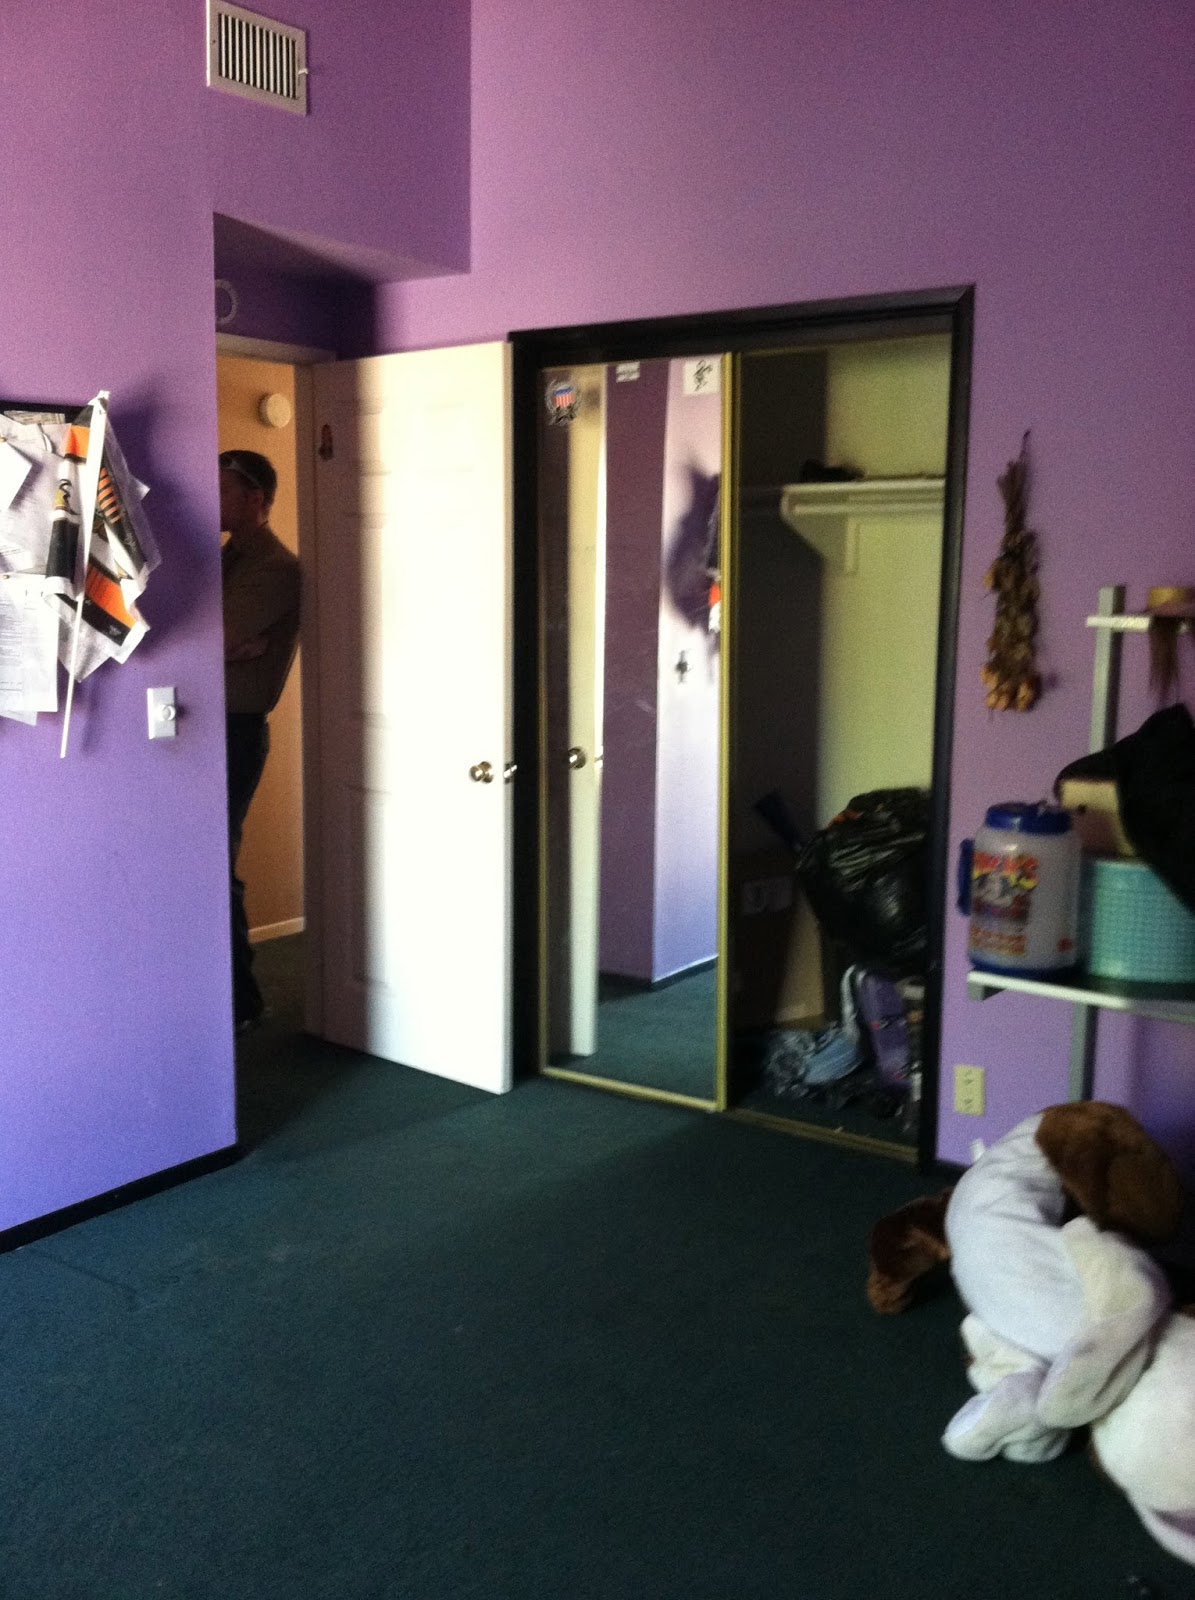
Well, I am sharing another incomplete project. This one needs some decorating. Here was little C's room before we closed escrow over 3 years ago now.


It was a lovely purple with forest green carpet and black trim.


We picked a nice blue for his room that went well with the dark floors. But C always though his room was too dark. He wanted me to pain the whole thing over again. C loves to keep so much stuff out and he fills up his skate board shelves so much that you can't even tell what they are. It's so hard to let him have his own style. I want them to have some freedom in their rooms, but also keep it clean and within some bounds. The shelves and dresser are just something I have to let go of. 


I didn't really want to repaint the whole thing and I had wanted to do some stripes from the beginning.


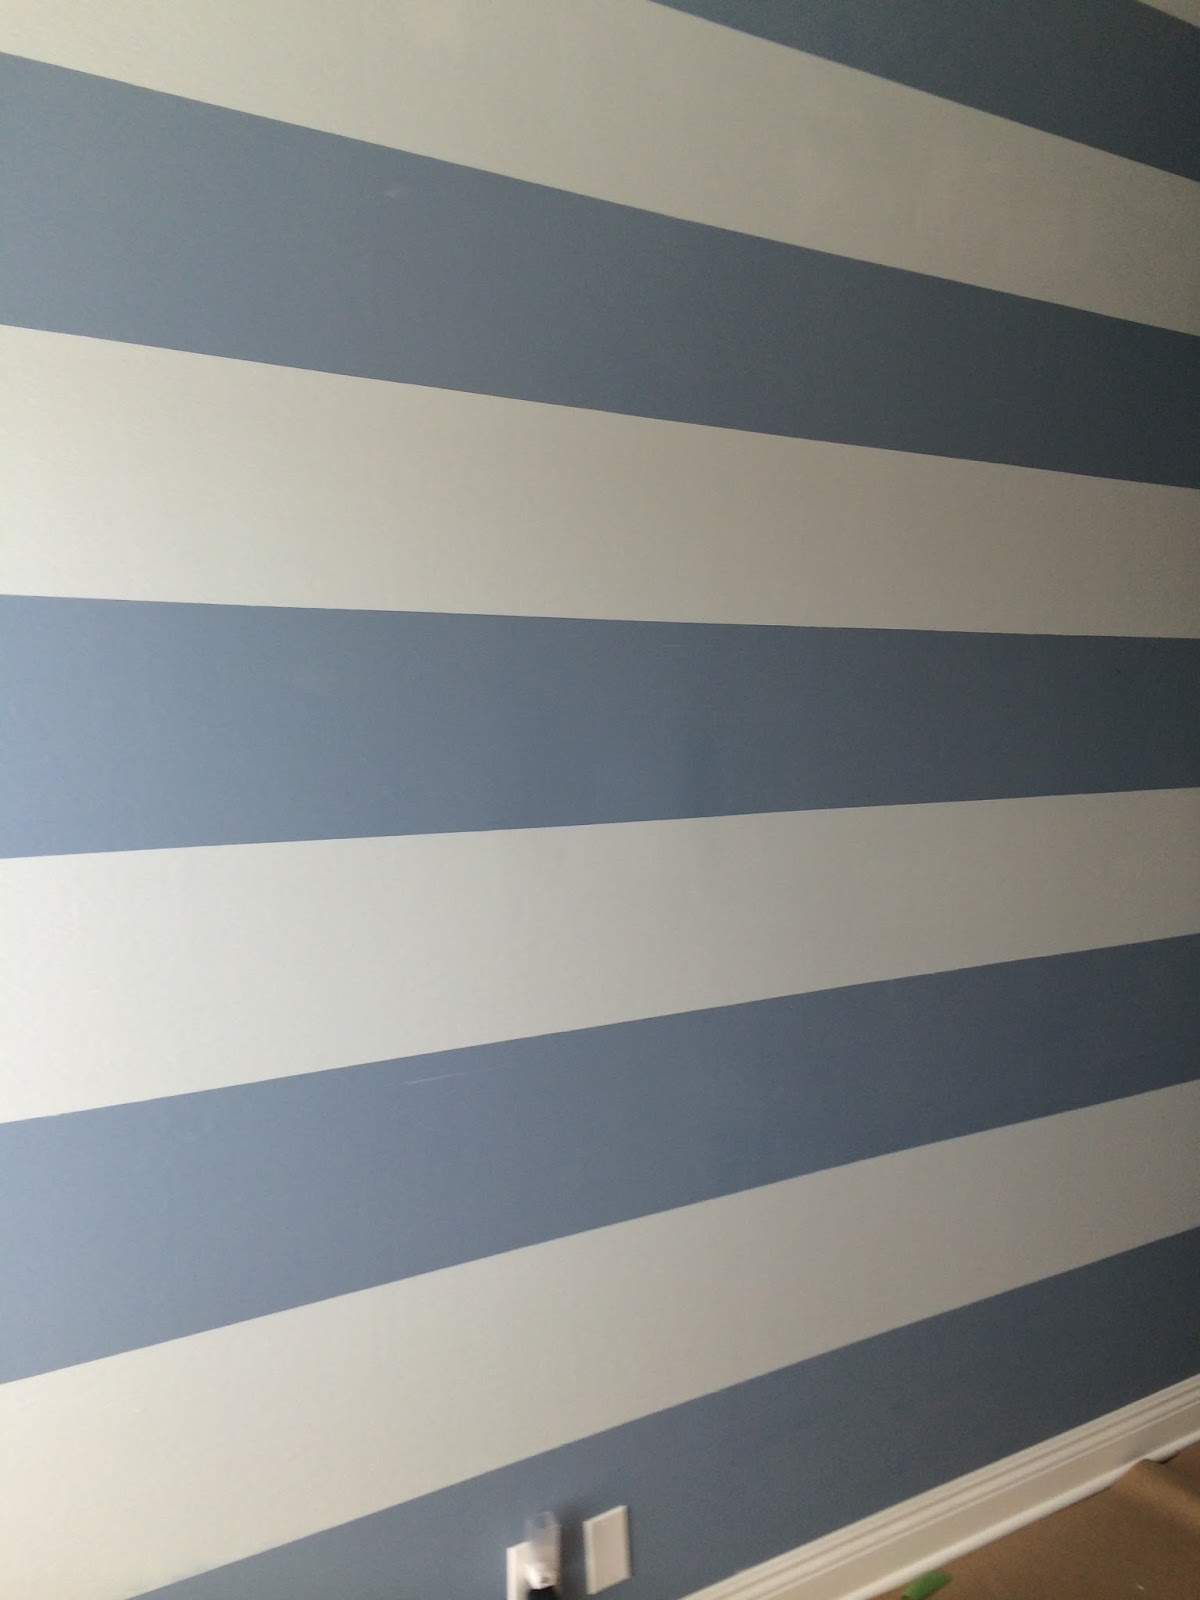
So, I talked C into letting me add a really, really light blue color for the stripes.


It's always nice to have some help!


This Green Frog Tape is the best! If you use it, just make sure you press it on really well and take it off when the paint is still wet. You can either click on my link or buy it at any home improvement or paint store.


The stripes actually turned out really good! I was very happy, they ended up being straight and level.


Little C doesn't sleep very well in the morning when the sun comes up so I also made him some black out curtains for his room. He picked the fabric. The stripes actually did end up lightening up his room quite a bit. Little C is very happy with them and is willing to keep the blue paint for a while.


Remember, I mentioned the things C likes to keep out, well he apparently likes to hang things from his ceiling fan also.


Here is the final Before and After! What a difference, but the sad thing is, when I showed C these pictures together, he looked for a while and then said, "I like it purple better." and walked away. 


Kristen

Tuesday, January 14, 2014

Bathroom Remodel

Finally, our yucky, yucky bathroom is getting re modeled! Yay! The sink barley dripped out water, the floor was discussing and the toilet was hardly cleanable.


At first glance it wasn't so bad.


But you take a closer look and here is what you see.


We pulled out that old linoleum and put in some nice cheap Home Depot tile.


Then, there was the shower. I scrubbed and scrubbed the shower so many times and this is the cleanest it would get.


We went for a nice quick fix where we just had it sprayed with a new finish. (I'm not sure what it is called.) It turned out great, clean and bright white. 


Then, replace a toilet, sink, mirror and light. We actually bought the sink and light over a year ago when our local Home Depot moved and had it's clearance. So, it's been stored till we got the energy for another project. Actually till I just couldn't handle it anymore.

Out with the old...


In with the new…


We also put a nice fresh coat of paint. It's a light grey that goes nicely with the light green in the room outside the bathroom.


This is the almost completed bathroom. I need to hang the hand towel rack and we need a shower door. Plus, once it was all put in and the sink was plumbed, we tested it, all the new plumbing worked great, but we saw water seeping through wall. Now we have to cut out drywall and fix more plumbing. At least it looks nice while I muster up the motivation to do drywall work.