Wednesday, July 13, 2011

Smocked Dress Tutorial

This is a very simple, comfortable smocked summer dress. Before you take a double look, yes, that is my son in a dress. I needed a model! I hope you all don't think that is too horrible that I did that to him.

First, here are some of the dresses I did for my special project...


Anyway, I'm making a bunch in different sizes for a special project. But, before I share the project with you, I need to get the tutorial up for others to copy. Since it is very late and I have been busy all day, there may be a few mistakes in here. If you don't understand something, please let me know and I will fix it right away. So here it is...

***There is a change to the straps for the Haiti dresses. The dresses that work the best are strapless or the straps sewn to the front ONLY so they could tie around the neck.

You will need:
1. Pattern paper or old sheet
2. Fabric with matching thread
3. Elastic thread

Here are your steps:
1. Make the Pattern
2. Cut out fabric
3. Sew sides
4. Hem top and bottom
5. Smock
6. Sew on straps.

No onto the details and pictures.

1. First, measure around the chest of the person wearing the dress. Then measure the length you want from just below the armpit to where you want the dress to stop and add an inch for hems on the top and bottom. For my dresses, I did 24 inches around and 24 inches in length for 6T; 23 inches around and 23 inches long for 5T; 22 inches around and 22 inches long for 4T.

Now take that 1st measurement, the one of the chest and multiply it by 1.5. Then divide it in 1/2. This will be the width of your pattern piece. I will use my 6T as an example. I had 24 inches around, times 1.5 I got 36 now divided by 2 and I have 18 inches.

I drew my pattern 18 inches across the top, went down 24 inches and 24 across so the dress goes out a bit and isn't just straight. I think it flows better this way. Here is my pattern piece.


2. Now, take your fabric and fold it, right sides together. I did wrong sides together, it really doesn't matter, but if you do right sides together after you cut it, you will just go right to the machine and sew. Anyway, lay your pattern on top and cut. My pattern might look a little big, that's because I forgot to divide by 2 up above. It took me a day to figure out why it was so big! Duh!


3. Now that your fabric is cut, right sides should be together. Take it straight to your machine and sew the sides with a zig-zag.


4. Then sew a zig zag around the top edge. Now because it's knit I don't even iron this part, just fold the top down a thumb width and sew straight along the hem. You can use the pressor foot as a guide for a straight line.

The bottom hem, I didn't do the zig zag first, I folded it a thumb width and sewed a zig zag along the folded edge. I didn't like the zig zag on the top so I did it with that extra step.


5. Once the sides and the hems are finished you are ready to smock. You need to take a new bobbin and hand wind the elastic. Be careful not to stretch it while winding it.


Stick your bobbin in the machine and sew straight lines around the top of the dress. I use my pressor foot as a guide for these lines.


Yes, it looks a tad messy at the top edge, but, in my defense, this was my first one; the trial one and I thought the contrasting thread would be cute. I wasn't exactly right on this one.


Anyway, when you have as many rows as you want, you are finished with the dress part. Iron up the top and it shrinks the elastic a bit more and you are left with straps if you want them.


6. For a child's dress, I usually take the middle and measure out 2 inches on either side. For the 6T, I measured out 2.5 inches, marked it and sewed on the straps.


***Since I was using knit material, I thought I would just try cutting some strips the non-stretchy way. (This knit only stretched one way.) So, there was no sewing for the straps, just to put them on the dress. Anyway for these particular dresses, they need to be very easy to get on and off. Someone had suggested buttons, but I was having great difficulty with the button holes in this very thin knit and buttons take me a very long time to sew. So, I left the straps long, fed them through the button holes and tied it off. It looked decorative.


Please remember this tutorial was done on the first one, the trial one and I messed up the pattern, making it way too huge! Also, the straps are way too far apart. I didn't follow my 2 inch rule because the dress was huge and I still hadn't figured out why. Once I realized what I did, I cut off the excess on the sides and made the dress much smaller. The other dresses turned out much better. But, this one isn't bad.

Anyway, here are a couple other dresses with some variations...


Kid Crafting

Ok, does anybody else's house ever look like this?


That's just a quarter of the living room. There is tons of fabric on the part not in the picture too. It's a little preview to my project that should be done tomorrow. :-) I'm very excited. Anyway, while I had that mess, C, L and I made this mess...


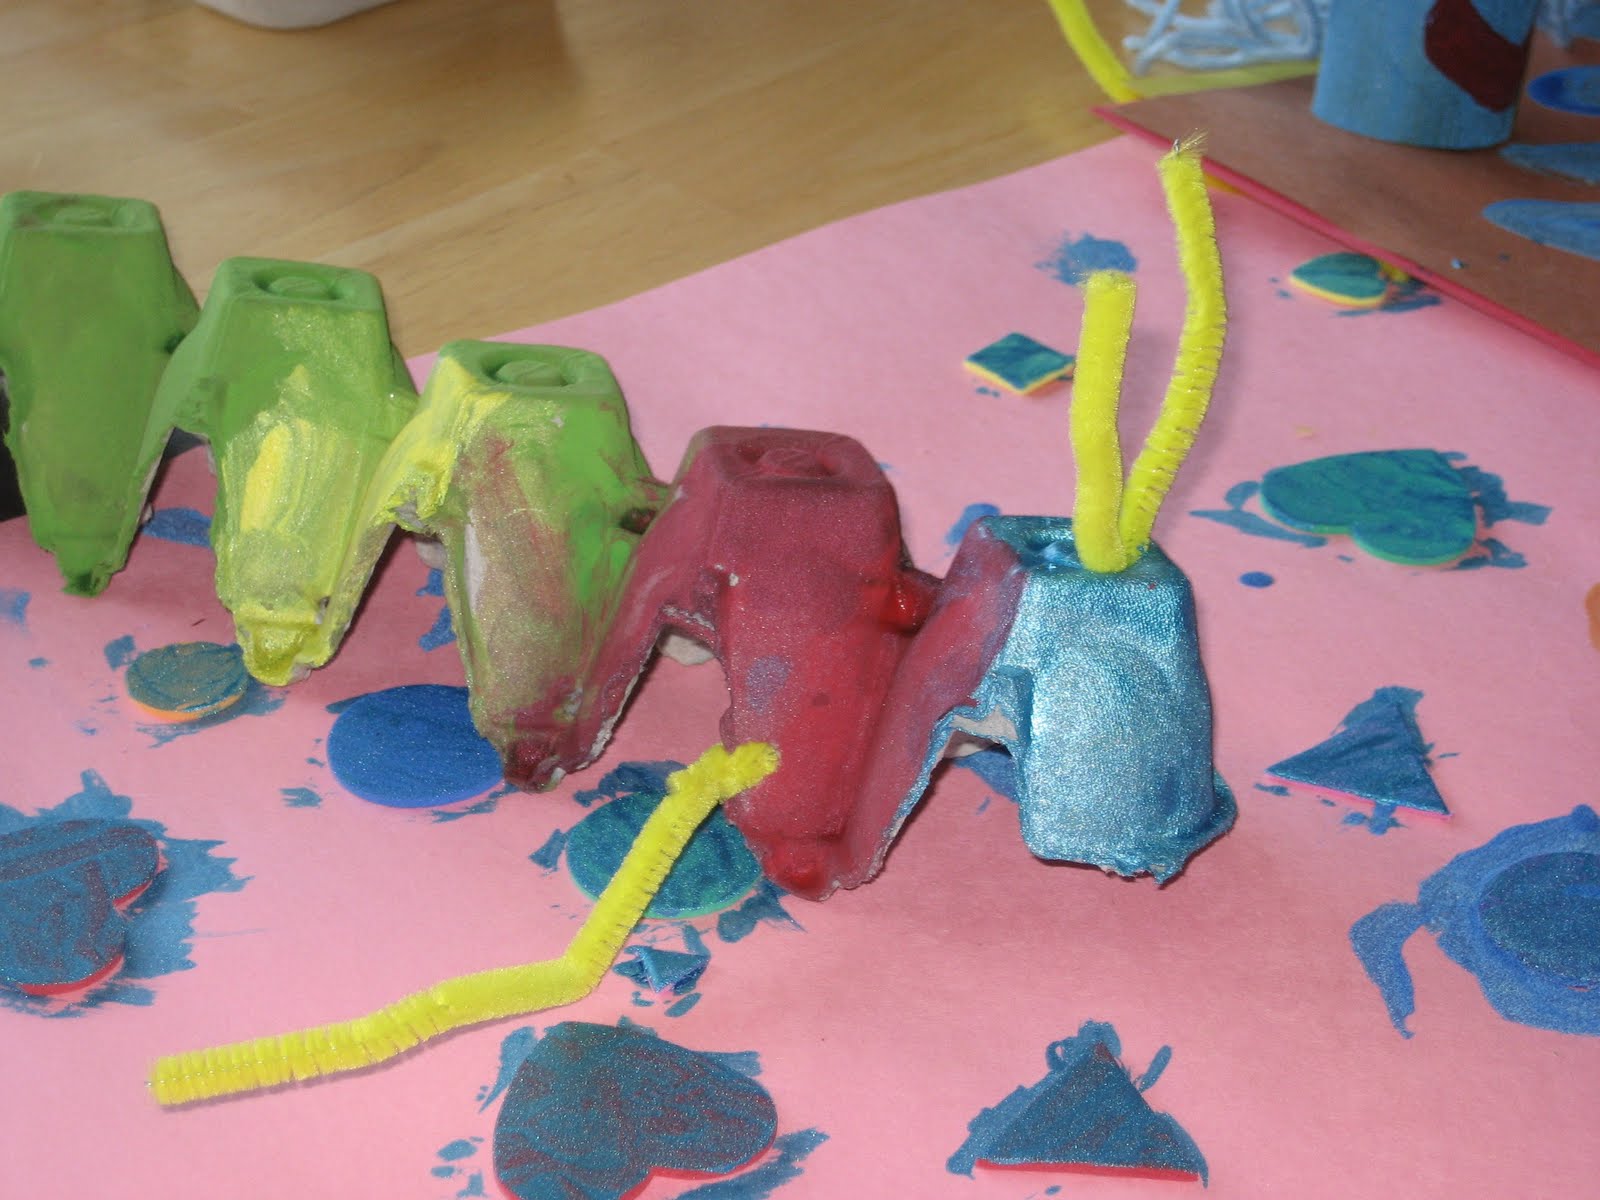
We decided to paint old egg cartons and toilet paper rolls.


They were very serious while working.


I couldn't even get them to talk.


When our critters dried we added pipe cleaners. C LOVES pipe cleaners. It's his favorite craft item.


Here are a couple of C's finished projects.


That little blue guy that you can hardly see, C & L spent almost an hour playing with it while I was making dinner. That was nice. They were using their little high voices to make it talk.


Now, back to sewing!

Kristen

Monday, July 11, 2011

Dinner from the Garden

This is one of the reasons I LOVE summer...


All those fresh veggies. They sure look yummy. Too bad they weren't all perfect. The lemon cucumber wasn't quite right and the regular cucumber I let grow too long. I was waiting to see if it was a lemon cucumber and if it was going to change colors. Obviously, it was not!

Isn't this a lovely garlic from the garden?


I was so excited when I saw how big the cloves were. I need to make roasted garlic with one of them.


I put the garlic with some olive oil in this butternut squash that was given to me out of another garden. Mine are not growing yet. I really hope that changes soon because I really love this stuff and because of the hard skin it keeps all winter long. Anyway, I bake it at 375 until it's soft and it is so, so good.


Here is my favorite salad made with all the summer veggies. I have the peppers, red onion, and carrots from the garden then I added some avocado, lettuce, feta cheese and almonds. I tossed it all together and added Trader Joe's Cranberry Walnut Gorgonzola Salad Dressing, my favorite! The only thing missing was the cucumbers.


To go with my salad and butternut squash, I made teriyaki meatballs, bell peppers and onions.


It was a delicious dinner!


Mostly all organic. The meat, avocados, cheese and dressing were not organic, but the rest was.

Did I make you hungry? :-)

Kristen

Sunday, July 10, 2011

Dress refashion

Yea! I'm back. I haven't been sewing much lately. It's been crazy around here, I've been packing, cleaning, going on vacation, unpacking, cleaning and doing it all over again. In-between River trips and vacations I've been very busy with swimming and beach trips, so there hasn't been much sew time. I also haven't had anything I've been dying to make. Until today! I got the sew itch yesterday.

First thing this morning I pulled this dress out of my closet.


I never wear it, it just doesn't look that cute. I bought it for about $2 on clearance. No wonder, huh. So, I cut the top off and cut down the skirt part to 1.5 times L's chest size.


I put the right sides together and sewed it closed.


Then I smocked the top and used the straps from the original dress for this new dress. Not much work at all and L loves it.


She was a little upset because I already made 2 other dresses this weekend and she wanted to wear those, but they aren't for her. So, I had to make her something too. You can probably see some of the sewing mess in the background. I have a big project I am working on that I will share with you soon. I'm so excited for it!!


The visor is from JoAnn's. L and C each brought $2 with them to pick out something. She has been wearing it ever since.

Happy sewing, I'm so excited to be back and sewing again!

OH! I almost forgot!!! I am SO excited! I got a serger for my birthday!!! It should be here between July 13th and 16th. I can't wait to get started. Oh My Goodness, I am so excited.

Kristen

Thursday, July 7, 2011

Hair Cut

L got ahold of the scissors! Her hair doesn't grow, she hasn't even had a first hair cut yet and she butchered the front of her hair.


So, I cut about an inch and a half off the bottom to make it somewhat match the front.


As it grows, I'll keep cutting till it evens out. I couldn't even layer it to make it work. She cut the front shorter then bangs.


Oh, I almost forgot. We are taking family pictures Saturday! We have only taken family pictures once before, when L was an infant. I guess she will have a barrette in her hair.

Kristen

Thursday, June 30, 2011

Yummy 4th of July

It was my turn to bring dessert to our weekly taco Tuesday and I wanted something with strawberries so this is what I came up with.


It was SO yummy! I just couldn't get enough. C isn't too fond of strawberries so I got to eat all his. Strange kid.


Here is the recipe if you'd like:

6 lbs strawberries
1 pkg instant vanilla pudding (bigger one)
1 bigger container cool whip
1 box vanilla wafers
some blueberries

I typically don't measure when I cook, so this is as good as you are going to get. Anyway, to make it, first make the pudding. Once the pudding sets up, fold in the cool whip. Then Layer vanilla wafers on the bottom, pudding/cool whip mix and strawberries. Repeat but on the top layer, add stripes of strawberries and use the blueberries for the stars part of the flag.

This dessert was SO yummy!!

I'm linking with:

Tuesday, June 28, 2011

Beach Blankets

I tend to get stuck at the beach either when it's cold and I'm wearing something for warmer weather because it was hot at my house OR when I think it's going to be cold and I don't have a towel, but it turns out to be nice and I end up in the water. So... I need a beach blanket that would serve both purposes. This is what I came up with.


That's L on it with her little 4th of July dress. The blankets go perfect! Anyway, on the top, I have fleece and the bottom is terry cloth. The fleece is super warm and the terry cloth absorbs the water if I decide to go in.


I love it! It stays in my car and is perfect for a pic-nic, ball game or the beach. When I made my blanket, my sister-in-law got one for Christmas, and my father-in-law got one for his boat in yellow because his boat is yellow and white.


These blankets have gotten a ton of use. There is just one small problem with my blanket. When I went on that hike with all the poison oak, I used my blanket that night at dinner when I was freezing before I went home to shower. Well, the oil from the poison oak transferred to the blanket. Every time I use it, I get mild poison oak where I hold the blanket under my arm. I used the darn blanket Friday, Saturday I got a few spots on my arm, used it again yesterday at the beach and more spots appeared this morning. So, last night I washed the blanket for the 4th time since the poison oak incident. Today, I used the blanket again at the beach. I'm praying it's all washed out.

I'm linking with:

Monday, June 27, 2011

4th of July Dress

Last year, I made L a little dress for the 4th. I made it a little long so she could wear it again this year. Holiday stuff just doesn't get worn enough. So, I pulled it out yesterday and it fit perfect. My little girl has gotten taller, but hasn't gained much weight. She's just a little peanut.


I just did a very basic dress, cut 3 pieces for the front, 2 for the bodice and 1 for the skirt. Then for the back I cut one piece and smocked the top part of it so it fits nice and snug and pulls over easy.


I used ribbon for the bow and the straps. I had some ribbon hanging down from the bow too, but that frayed since I didn't use any fray block, so I had to remove that.


It's hard to take a picture of one without the other sneaking in.


Very simple, just my style.

Kristen
I'm linking with:

I am linking with the blog hop party over at:


Sunday, June 26, 2011

Bio-diesel

It has been a while since I have had my home made gas. We finally got enough oil to do about 30 gallons and we will have one more batch soon.


It's probably been 2 months of buying gas at the pumps for close to $5! It has been terrible. Since many have asked how the gas is made I have some pictures for you. I still can't answer the question other then it bets warmed (green barrel), transfered and mixed and mixed again (white barrels).


All these levers help with the transferring and mixing process.


Then, it separates, the soap gets removed and finally it gets filtered and flows into my big gas (black) barrel that I fill up from (red pump).


Those filters were made out of old soda kegs. My husband actually made the entire thing. It's pretty cool, but I never paid enough attention to learn how to do it. I leave that up to him. We each have our projects, I like to stick to the sewing and painting. He loves chemistry and building.

Don't I have a wonderful husband to do all this for me. :-) Well, I guess it's for him too.