When my son started preschool I started thinking how much waste he was going to have with his lunch. I knew the preschool wasn't recycling so I wanted food containers that didn't have a bunch of toxins in them and that were re-usable. So, I searched around and found little tins that were nice, but expensive. I bought him 1 for his yogurt, but I needed more. I did also find a reusable sandwich wrap, it was cloth on the outside and plastic on the inside. It was also washable. That's when I thought of the snack packs! I was so excited. I had some old scrap fabric that was in strips. Not much I could do with, but C sure loved it. So, I thought that would be perfect. Now, it took almost a year to figure out what plastic to use and I came up with the food saver bags. They are washable and they are food safe with no voc's or bpa's. :-)
Here are my snack packs. The kids LOVE them. Plus when they get too dirty for a good wiping with water, I just throw them in the wash.
Now, I am going to attempt a tutorial. Since I am new at this whole blogging thing, I have never done one. But those snack packs are so easy and quick, (literally 15 minutes to make 2), that I thought I had to do it.
First, here is what you need:
1. Roll of food saver bags
2. Sew on velcrow
3. Cute fabric
4. Thread
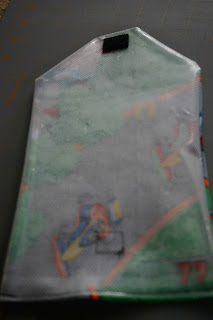
First, cut the fabric in the shape above, then cut the food saver bag in about the same shape. Lay them right sides together (with the food saver bag, it's the inside part of the bag). I like the bumpy side better, it's less slippery, but I use both. Can't waste any! Then sew around the edges leaving the bottom open. I like to cut the plastic after I sew incase it slips a bit.
Next, turn it right side out, fold under the bottom and sew. Sorry, I forgot a picture of this.
Then you sew on the top Velcro.
Next, fold it up like you are done to mark where the other velcro goes. I've tried to sew it like a bag first then the velcro, but it makes sewing the second piece on a pain.
Don't pin, just hold it there. The pins make little tiny holes in the plastic. Sew the velcro. After that fold it like a bag and velcro it closed. Sew the sides closed and top stitch around the top flap and you are done.
Happy snacking!
This post was featured on:

I am linking with:


Great turtorial! Pictures helped a lot. I have been looking at the sandwich wrap that is sold at Target that is made kind of like this. Can not wait to try.
ReplyDeleteGreat job for your first tutorial! I've been meaning to make snack pouches but hadn't gotten around to figuring out what to use to line the bag, so thanks. I'm fairly new to blogging too and also attempting to be as enviromentally friendly as possible. Stop by sometime domesticdeadline.blogspot.com
ReplyDeleteThese turned out great. Thank you for sharing. I'm your newest follower. I'm having my first link party tomorrow (Monday). It would be great if you could stop by and post your project. http://diyhshp.blogspot.com/
ReplyDeleteI LOVE this project! I hate using plastic bags and you can only fit so many reusable boxes in one lunch box. I had no idea what to use on the inside - thank you for the tutorial! Can't wait to try it!
ReplyDeleteI'm a new follower too! Love your blog!!
I cant wait to make some of these but one question, How to wash them. Hand wash only and line dry or can they go in the washer and or dryer. Although i line dry whenever it's not raining :)
ReplyDeleteVelcro...not Velcrow (Item #2 in your "ingredient" list)
ReplyDeleteCan you make these with regular gallon plastic bags? I would hate to have to go buy food savers when I have scrap fabric and regular baggies.
ReplyDelete