Well, it turns out 2 of our chickens were roosters. It started last weekend, Mr. C thought he heard the singing of a rooster at 6 am. I slept right through it and couldn't understand how he "thought" it was a rooster. You either hear a bock or a cock-a-doodle-doo. 2 days later I heard it, it was definitely a rooster. Mr. C went out there to see who it was and the little boogers were in the roost. Couldn't see them. Yesterday, I snuck up on them, peaked through the hole at the top and saw 2 singing. BUMMER! We started with 4 and now were down to 1. Our white one got taken away by a Red Tailed Hawk.
I called the very nice lady we got the chickens from and she said to bring them back and get new. Today we went with 2 roosters and came back with 5 more chickens! Don't we have such a pretty flock?
Too bad it wasn't just that easy to get them in the coop. I had the carrier outside the coop waiting for little C to go potty. L comes out and opens the door when my back is turned. I hear, "Mommy, L let the chickens out!" WHAT?! I look and 3 chickens are scattering all over. We not have a nice enclosed small yard. We live on about an acre of land. This was not an easy task getting them back in.
I'm trying to gather them into one area barking orders at the kids to help me and get their dad. Finally they come walking over as I'm yelling, "Did you tell daddy the chickens are out?"
C responds, "Yes."
Me as I've got my arms spread bending over trying to heard in the chickens: "Where is he?"
C says calmly, "Over there."
Me: "Over where? Outside?"
C: "Yes"
Me: "Did you tell him to come?... Then I yell at the top of my longs his name!
So, Mr C comes over asking what happened before he jumps into action. Like we really have time for the discussion of what actually happened! The point is I need help or we are going to loose 3 of our new chickens that don't know where their home is and who are running around like a chicken with it's head cut off.
Eventually it becomes me chasing down the chickens. I thought that I could just chase them right into the coop so I asked little C to go to the door and open it. By open it I meant wait there and open when it's time. I guess I should have been a little more clear to a 5 year old because I see Robin running out of the coop! Oh my goodness! Luckily, Robin is our only original chicken left and she knows where her home is. She also knows what corn is when I toss it at her. The new ones just ran further away. We got Robin back in the coop pretty quickly then I was off to capture the others.
Finally, after running all over the place, get to where I can grab one, she is kind of cornered. I step, reach and go tumbling down! I get back up and I'm not sure if she is looking at me because I looked crazy or she is confused by what just happened. But, she is still there a just bit further, so I quickly step a little closer to reach again, but my foot landed on a fallen orange from the tree and slid all the way till I was down in the splits and the chicken was gone. That was this girl that looks like she has a hat.
I did eventually manage to get her. Yes, it was me that grabbed her and all the rest while Mr. C was doing some chasing or blocking and laughing. Little C and Mr. C named her Alice.
This pretty girl, well hopefully girl, is Daisy (my name choice). She is one that got out. I got her just as she ran out from under the trailer. Mr. C scared her out from the other side and I grabbed. She got out of my hands, but I grabbed again. She is a beauty!
This little one here is Snowy. Little C said the white on the tips of her feathers looks like snow so he wanted to call her Snowy.
The last one we caught was Honey II. One of our Roosters we named Honey because of her honey color. She is a honey colored frizzle like the chicken above. I didn't get a good picture of her because she kept hiding behind the others. But she was the most wild. I tried to get her over to the coop in the beginning, but she just ran to the other side of the house on top of the wall that has a huge drop on the other side. I was worried she'd go down there, so I left her alone to calm down. After the first 2 were in, we went and found her at the other side of the house waiting to go in. Mr. C suggested we let her in, then it might be easier to catch her... Yeah, right! and get poop all over my house?! I don't think so.
She was running and flying all around and she flew right in-between our back door and laundry room door. HA! Trapped, cornered. I grabbed and put her in the coop. I was pooped after that. There was my cardio for the day.
Now that we have 6 chickens that are safely in their coop, no broken bones on my end, hopefully we will have some eggs and no roosters. Those chickens are not getting let out for at least a month now.
Kristen
Friday, May 13, 2011
Tuesday, May 10, 2011
Tank Top
I've got my sew back! I haven't sewed in a while because of the poison oak and then just trying to get stuff done around here. I've had a couple things that I wanted to get done, some I'm still not ready to sew and others I just got too excited about to wait.
Anyway, this is what gave me my sew back.
I have another idea for a new tank using a slight change to this pattern that I can't wait to try and I hope it turns out. I will be showing you soon.
Ooh, I almost forgot to tell you. The shirt I bought was $7.95, the fabric I used to make the new one with was $2 and I have a ton left to make something else. So, I got 2 perfect tops for $9.95.
Kristen
I'm linking with:
Anyway, this is what gave me my sew back.
Yes, I think I have a slight tank top addiction. I can wear them every day. More then half the clothes in my closet are tanks.
Naturally, when I tried on this tank and loved the fit, I knew I had to make more... many, many more. I also knew I had fabric at home just waiting to be cut and sewed into this tank.
Yes, that is my new lovely label. Now, here is my new lovely tank...
I have another idea for a new tank using a slight change to this pattern that I can't wait to try and I hope it turns out. I will be showing you soon.
Ooh, I almost forgot to tell you. The shirt I bought was $7.95, the fabric I used to make the new one with was $2 and I have a ton left to make something else. So, I got 2 perfect tops for $9.95.
Kristen
I'm linking with:
Totally Creative
Sometimes little C amazes me with his creativity. This may sound silly, but I really don't think of myself as creative. I have to get my ideas from somewhere. I love sewing so much because I like to figure out how to make a pattern and fit the pieces together to make clothes. I love looking at clothes from the store and figuring out how I can make my own. So, you see, my type of sewing is more mechanical then creative. I've always had a mechanical mind and I have always wished I was more creative. When I had kids I wanted to make sure they had to use their brains to come up with ideas on their own, something I was horrible at. One of the ways I try to do that is by not allowing more then 1.5 hours of TV per week and no TV before 2 years old. The other thing we do is read books like crazy. Even chapter books. I'm not sure if this helps or if for some people it's just natural to be creative. Mr. C is pretty creative, maybe that's just where little C gets it. Anyhow, whatever the reason C seems to be pretty creative.
Here is why I'm writing about C's creativity. C got home from school to find a box lying on the ground. Immediately he went to get some toilet paper roles and other "supplies" then set out to make a race car. He spend most of his quiet time almost 2 hours on this little race car.
Here is the back with 2 exhaust pipes. Notice all the tape? We go through a LOT of tape around here. I am always finding it things taped together. Rope or string is something else I find a lot of. Right now we have pulleys all over the work out bench holding bears up. It looks pretty morbid, but C doesn't get why that would be.
Here is the side, you can see the wheels at the bottom.
The front with the yellow lines as the lights.
Now the inside, see the green bench seat?
Little C was very proud of this race car. It sat in the house for days just for him to look at, not play with.
Here is why I'm writing about C's creativity. C got home from school to find a box lying on the ground. Immediately he went to get some toilet paper roles and other "supplies" then set out to make a race car. He spend most of his quiet time almost 2 hours on this little race car.
Here is the back with 2 exhaust pipes. Notice all the tape? We go through a LOT of tape around here. I am always finding it things taped together. Rope or string is something else I find a lot of. Right now we have pulleys all over the work out bench holding bears up. It looks pretty morbid, but C doesn't get why that would be.
Here is the side, you can see the wheels at the bottom.
The front with the yellow lines as the lights.
Now the inside, see the green bench seat?
Little C was very proud of this race car. It sat in the house for days just for him to look at, not play with.
Monday, May 9, 2011
Clothing Labels
Oh no!! I washed my shirts with the labels sewn into them and the ink washed right out. I am so sad. I need to figure out a way to make it permanent. I heard just press it with a very hot iron. That doesn't work. Maybe if I soak it in vinegar.
Well now, I just discovered what can be done with freezer paper. I've seen it all over blogs, things done with it, but I never knew how. I stumbled upon a little youtube video on making home made clothing labels. I have wanted labels for SO long! But they are so expensive that I can't really justify buying them when I sew mainly for my family or gifts. When I saw this video I was so excited, I could hardly wait to get to the store, too bad I saw it at 10 pm last night. But, guess what did first thing this morning...
Yep, I bought my first pack of freezer paper. C was so excited to see what it was as soon as quiet time after school was over, we opened it up and got to work. First, I cut a piece the size of a piece of paper, then cut my fabric that size also.
Here's all my pieces. Now, I only need the freezer paper and the fabric. I ironed the fabric to the shinny side of the paper.
Lovely! I was so sad thinking it wasn't going to work. Then I decided to try to iron more with a hotter iron and look what I got. :-)
I really couldn't contain my excitement. I had to sew a shirt just so I can put a tag on.
After the labels are printed, just peal it off the freezer paper. C did this part for me.
Here is a sneak peak at what I made. I have to show you the label on something, but I'm not ready to post this top. Tomorrow, after I get a picture wearing it I will post. I just love how the label looks! I love the raw edges and the unbleached muslin I used. It looks very natural. The best part... they don't itch one bit.
Oh, freezer paper, a new found love. Oh the possibilities. I am so excited about this. I know many of you are probably going, duh! Where have you been? That's ok though, I don't mind.
Here is a little green idea for this. You can use scraps of solid fabric to iron on your paper. Something new to do with those odd shape scraps that are not long enough to go into a basket.
Kristen
Well now, I just discovered what can be done with freezer paper. I've seen it all over blogs, things done with it, but I never knew how. I stumbled upon a little youtube video on making home made clothing labels. I have wanted labels for SO long! But they are so expensive that I can't really justify buying them when I sew mainly for my family or gifts. When I saw this video I was so excited, I could hardly wait to get to the store, too bad I saw it at 10 pm last night. But, guess what did first thing this morning...
Yep, I bought my first pack of freezer paper. C was so excited to see what it was as soon as quiet time after school was over, we opened it up and got to work. First, I cut a piece the size of a piece of paper, then cut my fabric that size also.
Here's all my pieces. Now, I only need the freezer paper and the fabric. I ironed the fabric to the shinny side of the paper.
Apparently, I didn't iron it good enough because this is how my first attempt turned out after I yanked it out of the printer.
Lovely! I was so sad thinking it wasn't going to work. Then I decided to try to iron more with a hotter iron and look what I got. :-)
I really couldn't contain my excitement. I had to sew a shirt just so I can put a tag on.
After the labels are printed, just peal it off the freezer paper. C did this part for me.
Here is a sneak peak at what I made. I have to show you the label on something, but I'm not ready to post this top. Tomorrow, after I get a picture wearing it I will post. I just love how the label looks! I love the raw edges and the unbleached muslin I used. It looks very natural. The best part... they don't itch one bit.
Oh, freezer paper, a new found love. Oh the possibilities. I am so excited about this. I know many of you are probably going, duh! Where have you been? That's ok though, I don't mind.
Here is a little green idea for this. You can use scraps of solid fabric to iron on your paper. Something new to do with those odd shape scraps that are not long enough to go into a basket.
Kristen
Sunday, May 8, 2011
Mother's Day
Mother's Day is one holiday I love. It's my excuse to make all the decisions about what I want to do on that day and I don't have to feel guilty about asking my husband to do all the cleaning. Mr. C knows I love flowers and gardening so he decided after breakfast that we would go to Armstrong to pick a couple potted flowers.
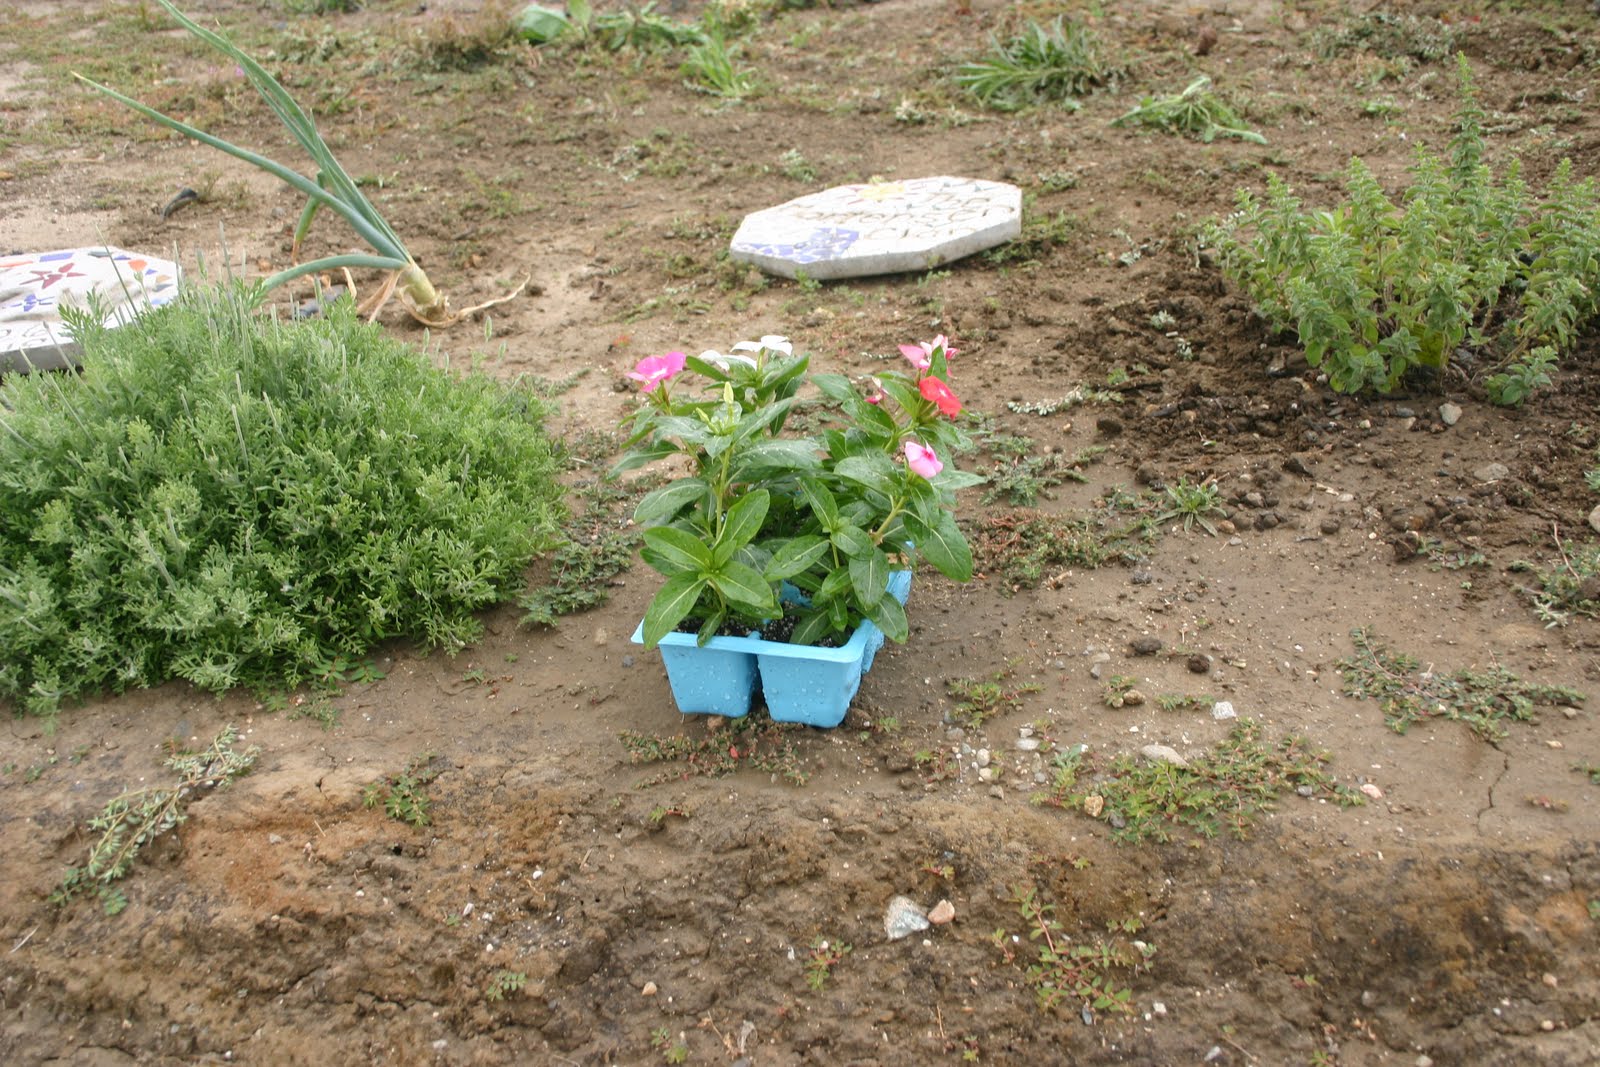
I let little C be in charge of pictures this morning. Here are the daisy's I got. I want these to grow huge and wild. We have so much dirt, I just need some pretty wild color.
Here is a little 6 pack of something that is supposed to get pretty big.
Here is Mr. C posing for a picture while planting some more beans and corn. Those salva were planted last spring and they were tiny. The pink flowers kept getting eaten by the rabbits until I started planting onions all around the flowers. The onions work wonders! I also use some stinky stuff called "Rabbit Scram." That works pretty good, but it stinks. The onions are much better and I get nice organic onions out of it.
Here are some flowers we planted as seeds in egg cartons a couple weeks ago.
I'm transfering them to these so they can get bigger before I plant them with the big bunch of flowers outside.
At church last night C and L made me a card with flowers in them. One is zinas and the other is daisy's. I love how wild daisy's grow. I'm so excited for those.
C is making sure that L doesn't water his side... It's always a battle.
Happy Mother's Day to all the moms in blogland. I hope you have a wonderful, peaceful day doing what you want.
Kristen
Thursday, May 5, 2011
Granola
I've been wanting to find the best granola recipe that doesn't have too much sugar. I love granola and so do my kids, but it is filled with sugar so we don't buy it much. Today I tried a new recipe that I will share with you. It's pretty good. I will share with you the original recipe and then how I made it with a few changes.
Here is the orignial recipe for Cherry, Almond and Cinnamon Granola
4 c rolled oats
2 c sweetened shredded coconut
2 c sliced almonds
1 1/2 c dried cherries, chopped
1/2 c vegetable oil
1/3 c good honey
2 t ground cinnamon
Well, I miss read the recipe to begin with, I thought it was cranberries. I thought that would be good so I started making it with cranberries. That was my first change.
Then I didn't have coconut so I added a little vanilla coconut milk instead. Well, L did, not me.
Since I didn't have coconut, I went looking through the pantry for something else to add. I found this date topping. We added a couple handfuls each. It's good and just dates in little pieces, no sugar added.
Then we put it into the oven at 350 degrees Fahrenheit for 20 minutes. Every 5 minutes I stirred it and took it out.
It was good! I did miss the coconut, but still we ate tons of it already.
Here is my recipe:
Cranberry, Almond and Cinnamon Granola
1/2 c date topping
One thing great about this recipe is, it's huge. If you have 2 kids split the recipe for each and they can each make their own batch at the same time. If that is yours are like mine and want to do every part and not take turns.
I hope you enjoy the recipe as much as I did.
Kristen
Here is the orignial recipe for Cherry, Almond and Cinnamon Granola
4 c rolled oats
2 c sweetened shredded coconut
2 c sliced almonds
1 1/2 c dried cherries, chopped
1/2 c vegetable oil
1/3 c good honey
2 t ground cinnamon
Well, I miss read the recipe to begin with, I thought it was cranberries. I thought that would be good so I started making it with cranberries. That was my first change.
Then I didn't have coconut so I added a little vanilla coconut milk instead. Well, L did, not me.
Since I didn't have coconut, I went looking through the pantry for something else to add. I found this date topping. We added a couple handfuls each. It's good and just dates in little pieces, no sugar added.
Then we put it into the oven at 350 degrees Fahrenheit for 20 minutes. Every 5 minutes I stirred it and took it out.
It was good! I did miss the coconut, but still we ate tons of it already.
Here is my recipe:
Cranberry, Almond and Cinnamon Granola
4 c rolled oats
1/3 vanilla coconut milk
2 c sliced almonds
1 1/2 c dried cranberries
1/2 c vegetable oil
1/3 c good honey
2 t ground cinnamon
1/2 c date topping
One thing great about this recipe is, it's huge. If you have 2 kids split the recipe for each and they can each make their own batch at the same time. If that is yours are like mine and want to do every part and not take turns.
I hope you enjoy the recipe as much as I did.
Kristen
Wednesday, May 4, 2011
Cabinets are Finished!
Wow! That took a lot of paint. Those cabinets were a pain to paint. It sure looks better though. Now I just have to do the doors.
Remember this...
It went to this after a coat of primer and paint...
Nope, never could get the doors off. The bottom ones turned out so much better because they were flat when I painted. They also took less coats.
After 1 coat of primer and 3 coats of paint we have fresh white cabinets...
Just look at those ugly handles! Wow, 70's. But, we are not going to buy new handles. I keep checking craigslist for free listings hoping to find something I can use. But, just painting it white looks worlds better. Next up, the doors on the bedrooms and bathrooms. I am going to have to barrow my father-in-law's paint sprayer for that project. Then the huge living room. I can't wait for that one. I cleaned a part of the wall yesterday and it left a big white spot where I cleaned. Ew!
Kristen
Remember this...
It went to this after a coat of primer and paint...
Nope, never could get the doors off. The bottom ones turned out so much better because they were flat when I painted. They also took less coats.
After 1 coat of primer and 3 coats of paint we have fresh white cabinets...
Just look at those ugly handles! Wow, 70's. But, we are not going to buy new handles. I keep checking craigslist for free listings hoping to find something I can use. But, just painting it white looks worlds better. Next up, the doors on the bedrooms and bathrooms. I am going to have to barrow my father-in-law's paint sprayer for that project. Then the huge living room. I can't wait for that one. I cleaned a part of the wall yesterday and it left a big white spot where I cleaned. Ew!
Kristen
Tuesday, May 3, 2011
Cabinet Update
Here is what I'm working on today...
I see this every morning when I wake up! So not a pleasant way to wake.
Also, I'm just not in the mood to sew. I have a couple of projects I want to get done, one being an insulated lunch bag for both kids. I'm still finishing the details of how I want to put that one together in my head before I go for it. But those ugly cabinets are what's been bugging me and I have to get them done.
Remember my white trim?
Well, now it's time to finish my room... almost. I'm not tackling the closets yet.
As I've said before, this is a rental. We love the house (layout) and the location is definitely unbeatable, but the house is a bit out dated and old. When I went to take off the doors to paint correctly, the bottom 2 came off beautifully. Then to the top, I couldn't reach and my husband gets up there to do it. The screws are completely stripped! Since we are renting, my husband doesn't want to take the time to do anything to the house so I am stuck trying to do a nice job painting with some of the doors left on.
I am in the primer stage but this is what I have to deal with. Bathroom door on the left, cabinet door on the right. Bathroom door is eventually going to come off and get painted with the bedroom door and the kids doors. But that's another day, another project.
After everything dries, I will paint that cabinet door.
Here is what the trim looks like all over the house.
Whoever painted before didn't even try to be careful. I am so over looking at that. This is the bathroom medicine cabinet. I want to paint that chocolate or black. Haven't decided yet. I guess one thing at a time.
Stay tuned for the final reveal later this week. :-)
Kristen
I see this every morning when I wake up! So not a pleasant way to wake.
Also, I'm just not in the mood to sew. I have a couple of projects I want to get done, one being an insulated lunch bag for both kids. I'm still finishing the details of how I want to put that one together in my head before I go for it. But those ugly cabinets are what's been bugging me and I have to get them done.
Remember my white trim?
Well, now it's time to finish my room... almost. I'm not tackling the closets yet.
As I've said before, this is a rental. We love the house (layout) and the location is definitely unbeatable, but the house is a bit out dated and old. When I went to take off the doors to paint correctly, the bottom 2 came off beautifully. Then to the top, I couldn't reach and my husband gets up there to do it. The screws are completely stripped! Since we are renting, my husband doesn't want to take the time to do anything to the house so I am stuck trying to do a nice job painting with some of the doors left on.
After everything dries, I will paint that cabinet door.
Here is what the trim looks like all over the house.
Whoever painted before didn't even try to be careful. I am so over looking at that. This is the bathroom medicine cabinet. I want to paint that chocolate or black. Haven't decided yet. I guess one thing at a time.
Stay tuned for the final reveal later this week. :-)
Kristen
Thursday, April 28, 2011
Girl it Up
At my MOPS group, we do a yearly Baby Boutique. It's so much fun, everybody brings stuff they don't use anymore and we divide it into $1 and $5 items. Most of the $1 stuff is 3 items for a dollar like clothes or toys. $5 items are big things like strollers, high chairs, jumpers, etc. We do it during a MOPS meeting and each table gets 5 minutes to shop. So, it's pretty fair. The first table obviously gets first pick, but they only have 5 minutes. Well, I was in the room helping with running it and one of the moms that has infant twin girls was debating this shopping cart cover.
This is what she brought me.
And this is what I did...
Not so boring anymore. I like the way it turned out. I hope she does too! Of course I had to add a little pouch. What shopping cart cover is complete without a pouch for toys and pacifiers?
Kristen
I'm linking with:
I told her, it's cute and could go girl or boy. She wanted it to look more girly. I said, "That would be easy, just get some ribbon and sew it on." She didn't quite know if it would be that easy, so, she asked if I could do that part...
This is what she brought me.
And this is what I did...
Kristen
I'm linking with:
Tuesday, April 26, 2011
Summer Dress
Yea! I manage to do some sewing yesterday. It was nice! Sunday night was my first night of real sleep since the Poison Oak thing started. Last night I was back to no sleep. I thought I could do it with out benadryl but. I was wrong! I ended up taking it along with a scalding shower at 2 am. Now, onto sewing.
Remember this?
I didn't have much fabric to make the skirt very twirly, but this worked. I cut the top and bottom separate because I wanted to do the slashing thing I told you about before. Basically, I took this, sewed the top right sides together, the skirt right sides together, then the top and bottom together. I finished all the hems and seams nicely, added straps and did the smocking last.
Here is what it turned out like. It's a bit big for L, but I did it to the measurements to her little girl that is older and taller.
I made the back with button holes and the straps long enough to be crisscrossed. Hopefully I can get a picture of her little girl wearing the dress so you can see it all filled out.
I was good to be sewing again!
Kristen
I'm linking with:
Remember this?
Well, I had a lot of extra fabric to do something with. I thought a little smocked dress would be cute for the little sister of the boy who goes in that baby carrier. Here is what I cut for my dress.
Here is what it turned out like. It's a bit big for L, but I did it to the measurements to her little girl that is older and taller.
I made the back with button holes and the straps long enough to be crisscrossed. Hopefully I can get a picture of her little girl wearing the dress so you can see it all filled out.
I was good to be sewing again!
Kristen
I'm linking with:
Subscribe to:
Posts (Atom)